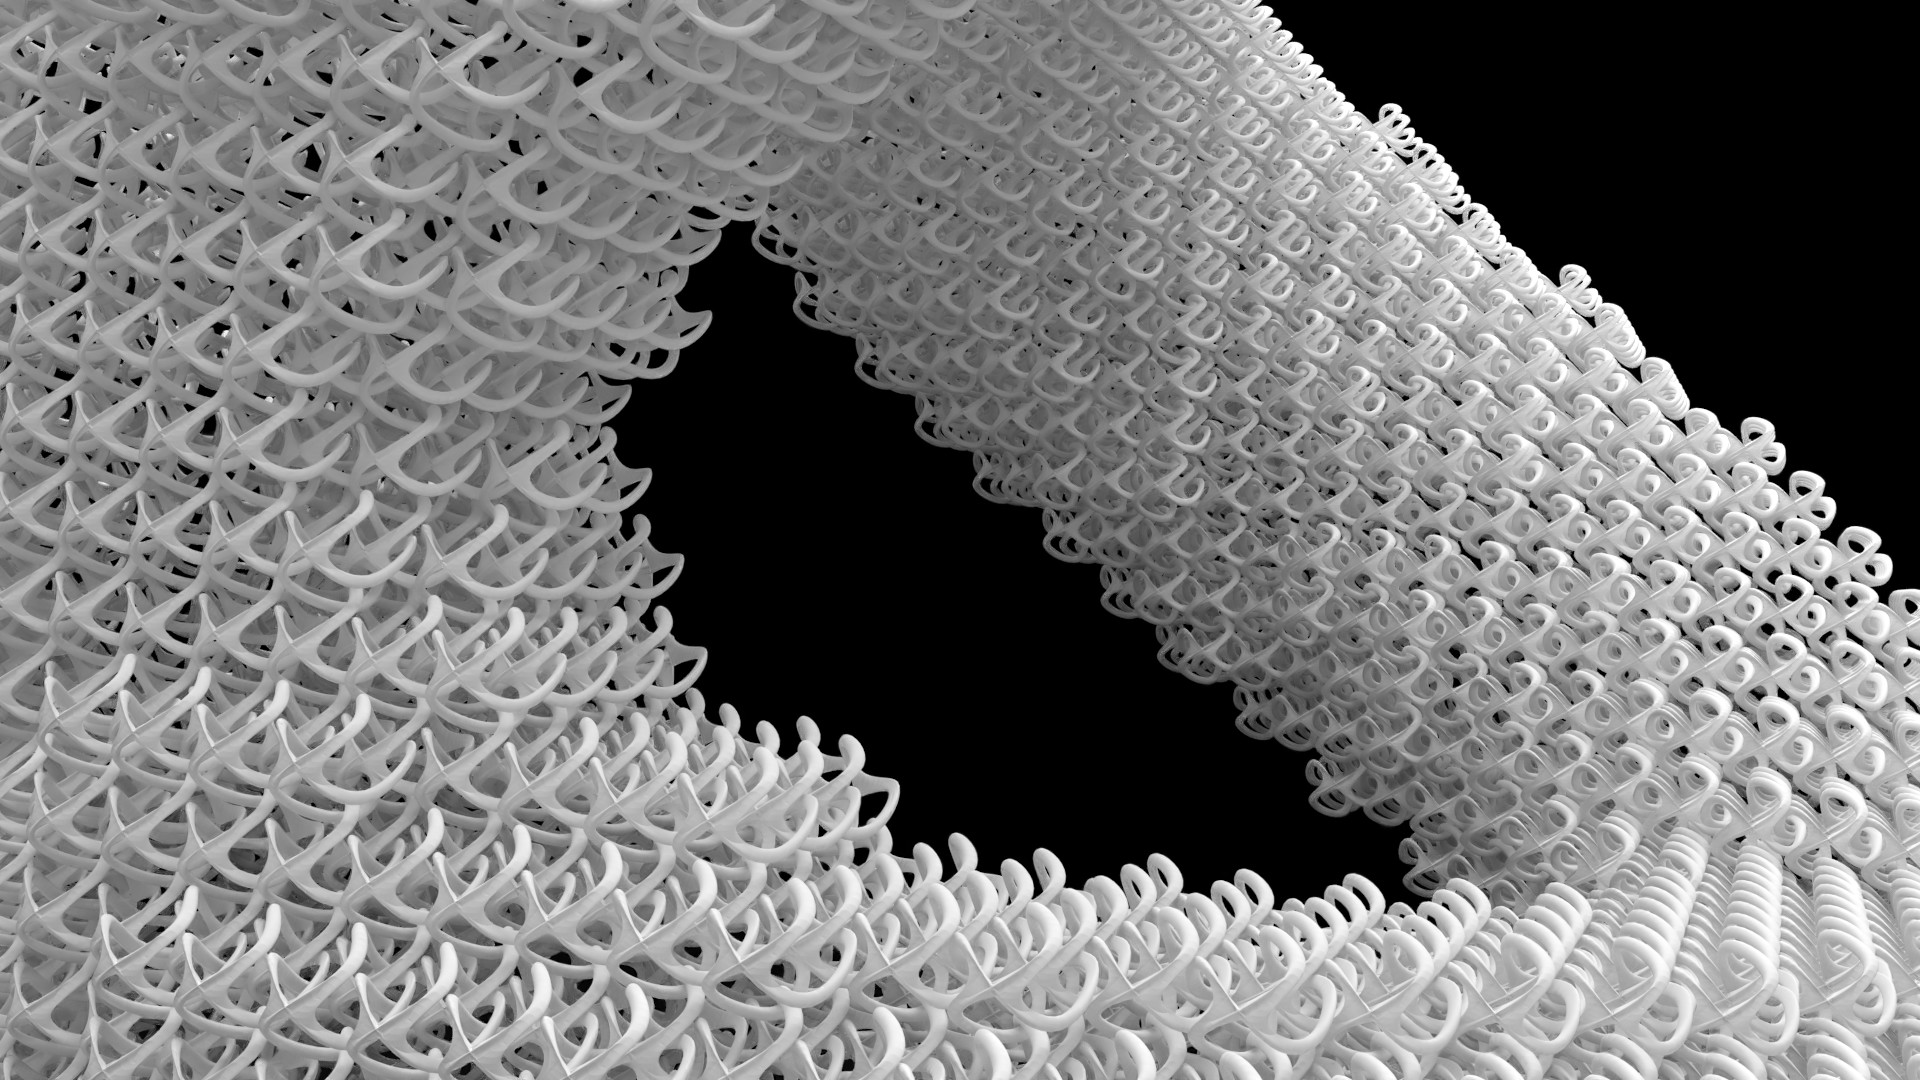


As I mentioned in my presentation about successful design for 3D printing, chain link designs of interlocking elements is one of the huge potentials of Additive Manufacturing. Technologies like Selective-Laser-Sintering (SLS) don’t need any support, so printing a web of interlocking elements can be achieved without a lot of design optimization. However, even metal Additive Manufacturing technologies like SLM/DMLS which are highly dependent on support structures, can realize interlocking elements, if only the design is optimized enough.
In this article, I will show you how to create those freeform 3D chain link designs in under one minute with the free and open source tool Blender 3D.
Creating 3D interlocking chain link designs with free Blender 3D.
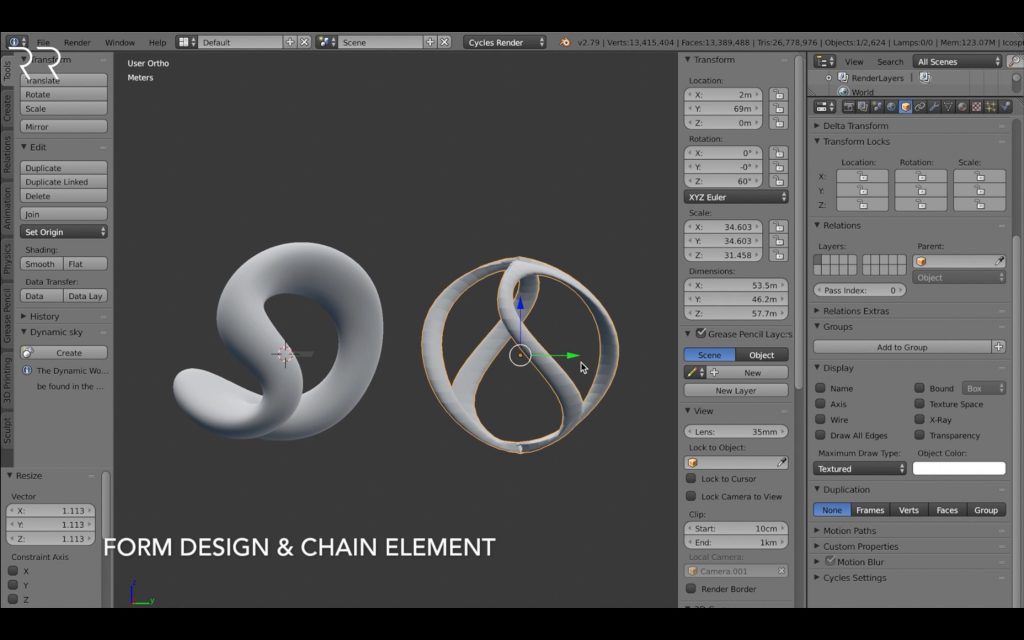
First of all you need a 3D mesh or an STL-file to define the form of your resulting chain design. The second object you need, is the chain element you would like to place around your design and interlock with each other. Keep in mind, that the mesh resolution of this mesh, shouldn’t be too high, since you will be creating hundreds of duplicates. Design the chain element in a way, to be easily interlocking, instead of creating solid connections with other elements. I found this element design very appealing and useful. Afterwards, you should scale down the original chain element to approximately the final size of all chain elements.
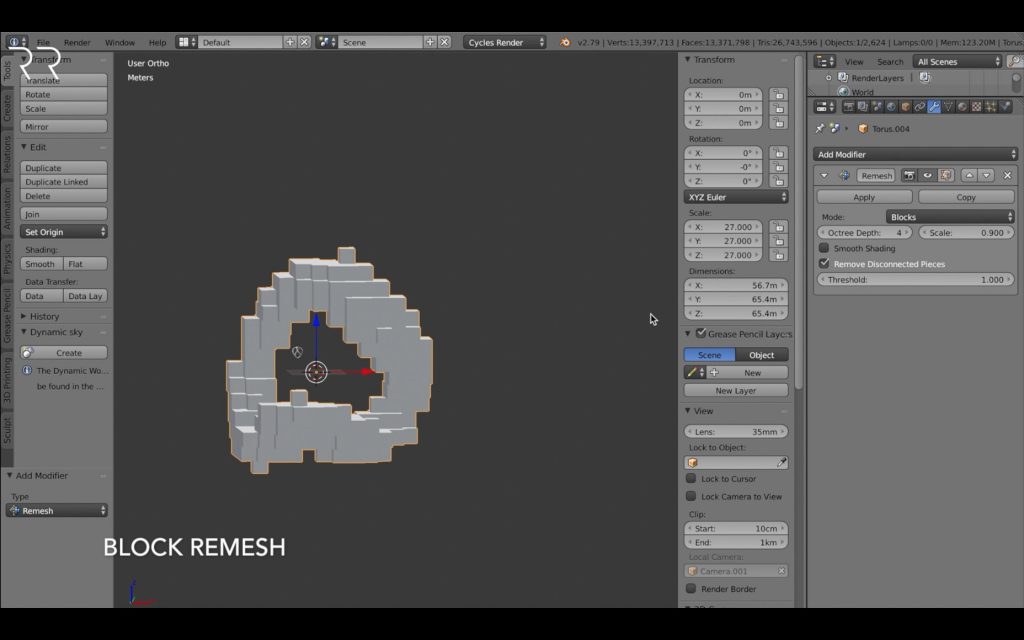
To place chain elements around this 3D form in the same distance, we have to create a mesh, consisting of mesh points (vertices) with the same distance to each other. I found the easiest way to do this, is to use the Remesh Modifier of Blender and set it to Blocks. Since the blocks are all of the same size, the vertices have the same distance to each other. If you want your form to be described more accurately by the blocks, you have to increase the resolution by increasing the Octree Depth value. But remember, your chain elements will be printed, and you shouldn’t design a wall thickness of your elements smaller than the minimum wall thickness of your Additive Manufacturing/ 3D Printing technology.
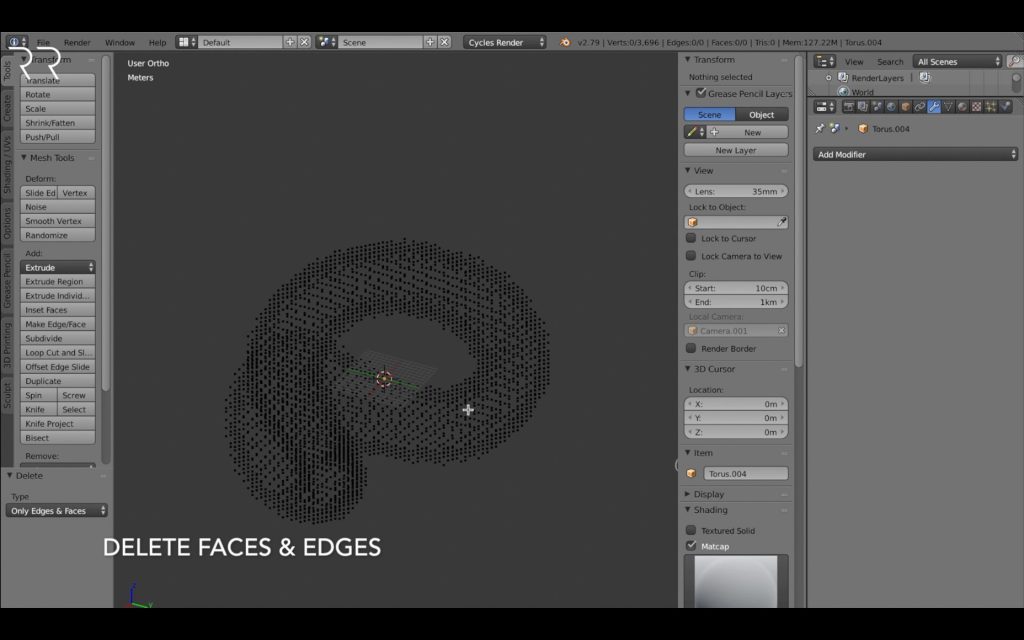
To have control over the final placement of your chain elements, go into Edit Mode, select the complete mesh with „A“, change to „vertices select“ and then „X – Delete Only Faces and Edges“. The result will show you only the vertices of your design. Later on, we will tell Blender to place a chain element on each of the vertices you are seeing right now.
To tell the software, which object to duplicate and place on the vertices, you select the chain element and then the design form, press „Ctrl-P“ and Set Parent to Object. The order of selecting the two objects is important.
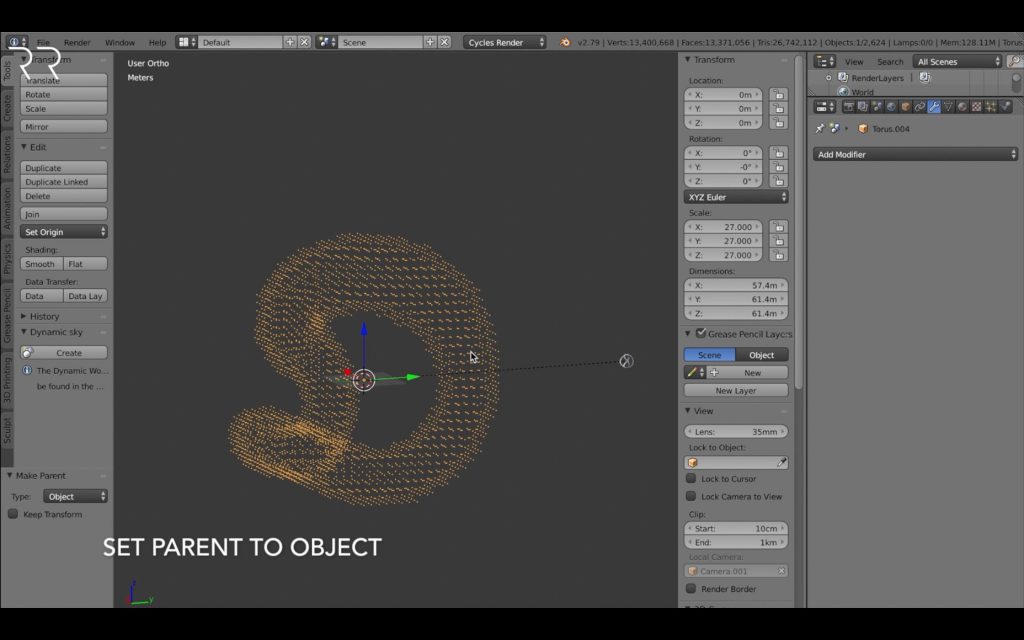
Now select your design form object and the object tab at the right properties panel. Under Duplication select Verts. You will see your chain element being placed in the form of your design.
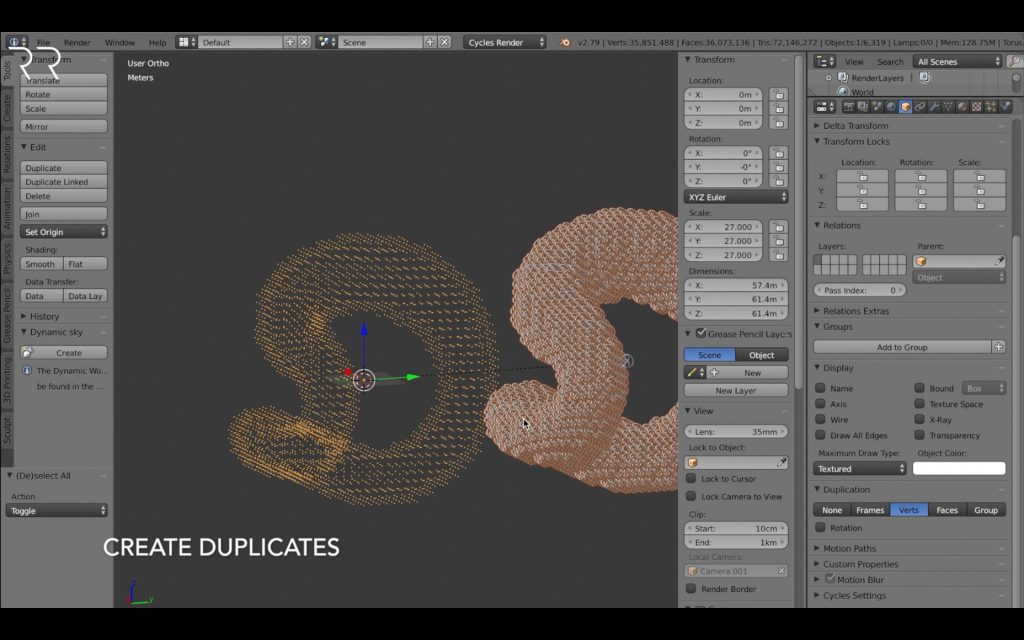
Scale your chain element down to properly describe your design form.
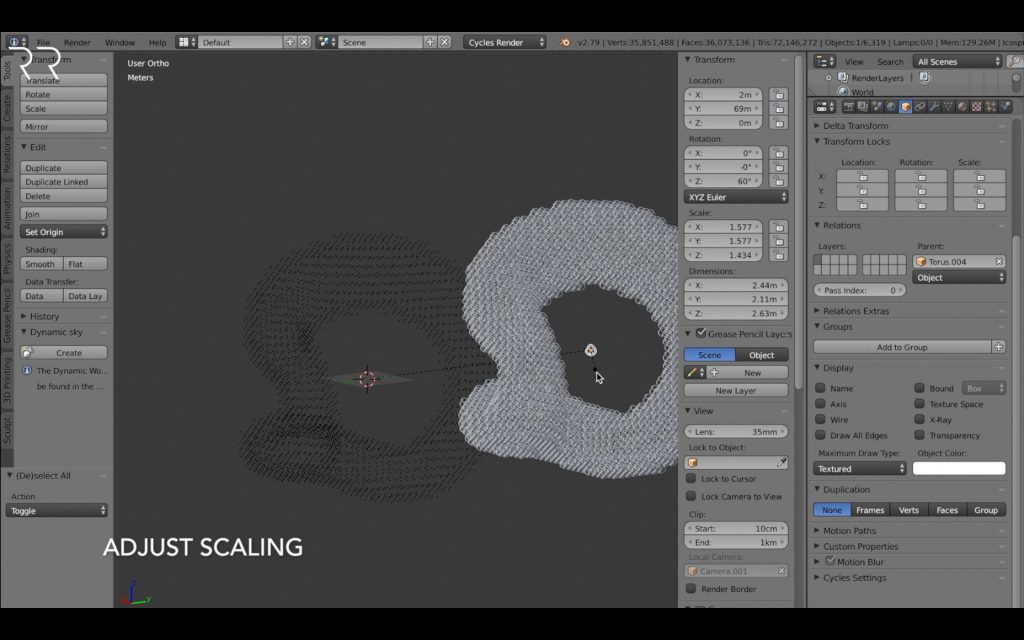
To ensure your chain elements are properly interlocking and not touching, zoom in and look closely. You can scale your original chain element to adjust the size and create a perfect link. Since we used the blocks to describe your design form, you can be sure, that all of elements link nicely if you only control a certain area. Remember, that most 3D printing technologies require a certain distance between objects to not bake together and form a solid connection. Hence, your chain link design should have enough gaps for the technology to create independent chain elements.
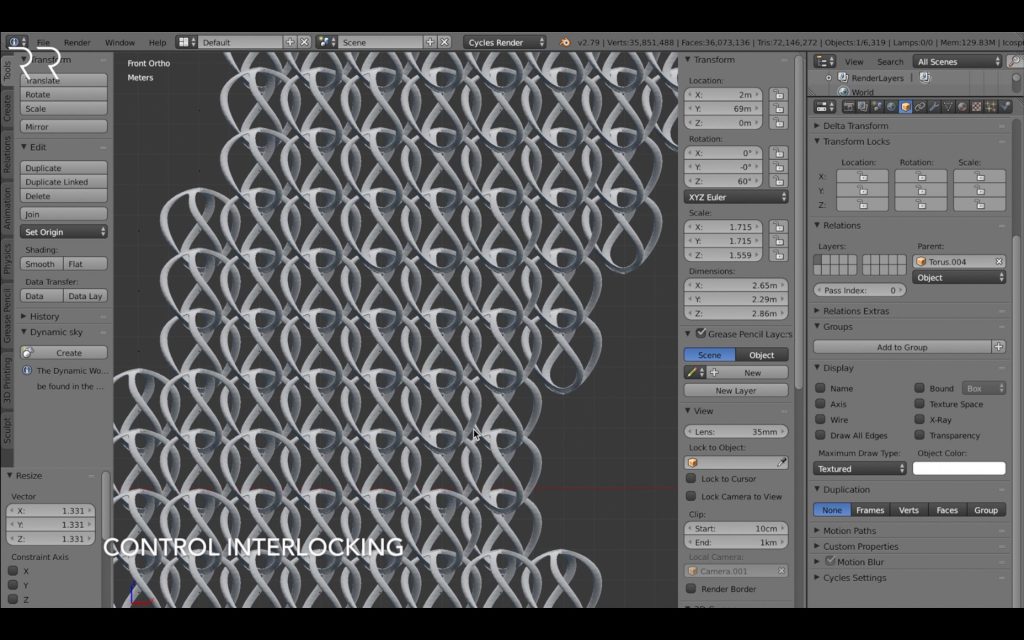
If you would like to change the thickness of your chain struts, select your original chain element, go into Edit mode, select the complete mesh with „A“ and then scale the mesh thickness with „Alt-S“.
When your chain elements are interlocking nicely, you can create real objects from your duplicates. If your chain design is consisting of a lot of elements, I suggest you save your file first. Then select the chain element duplicates and press „Shift-Ctrl-A“ this will separate all chain elements and create independent objects. Now you can delete separate elements.
However, if you go into edit mode, you will notice, that all of them are still using the same mesh data. In case you would like to edit that separately as well, select the chain element you would like to edit, click „U“ and Make Single User: Object & Data then you can edit the object mesh independently.
After you finished all your edits, you should delete the original design form and chain element, to export the final STL design for Additive Manufacturing/ 3D Printing.
I hope this quick overview on how to create interlocking chain designs is helpful for you. Please feel free to comment or send me your creations and ask me any questions!
Sign up to stay up to date about the newest tricks in
Design for 3D printing/ Additive Manufacturing.
V
Diese Website verwendet Akismet, um Spam zu reduzieren. Erfahre mehr darüber, wie deine Kommentardaten verarbeitet werden.
Schreibe einen Kommentar